
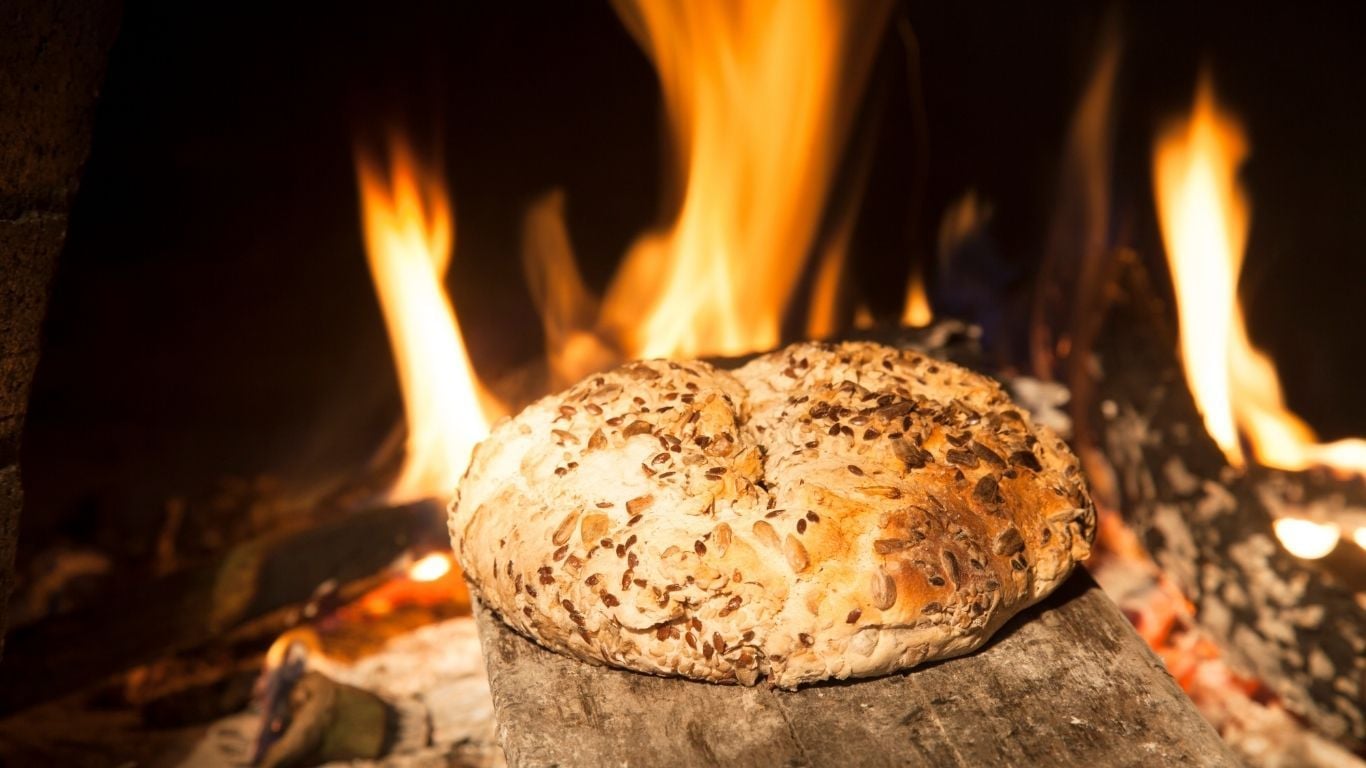
The Cozy Winter Kitchen: Holiday Cooking on a Wood Cook Stove
 "The Cozy Winter Kitchen: Holiday Cooking on a Wood Cook Stove")
December in Canada is a time for warmth, family gatherings and comforting meals. Outside, snow and cold settle over the landscape. Inside, kitchens fill with the aromas of bread, pies, roasts, soups and other seasonal favourites.
Cooking on a wood cook stove can make these traditions feel even more memorable. The fire provides home heating while the expansive cooktop and built-in oven support everything from a slowly simmered stew to a batch of freshly baked cinnamon rolls.
Wood-fired cooking is also different from using a conventional electric or gas range. There is no single button that instantly changes the heat. Temperature responds to firewood size, moisture content, airflow, chimney draft, oven controls and the location of cookware on the stove.
Once you understand those variables, a wood cook stove can become a versatile and rewarding centrepiece for holiday cooking.
How a Wood Cook Stove Heats Food
Most wood cook stoves provide several ways to cook:
- Direct heat from the cooking surface
- Gentler heat farther from the firebox
- Enclosed heat inside the oven
- Residual heat for warming food or dishes
- A warming shelf or warming oven on equipped models
The exact heat path depends on the stove's design.
Some models use an oven or bypass control to redirect hot exhaust gases around or beneath the oven. Others rely on natural convection, internal dampers, re-burn systems or thermostatic controls.
Do not assume that the controls on one stove work the same way on another. Review the owner manual before your first holiday cooking session and identify:
- The combustion air control
- The oven or bypass control
- The flue damper
- The oven thermometer
- The hottest and coolest parts of the cooktop
- The recommended startup and baking procedures
Wood Cook Stoves for Holiday Cooking
Northern Cookstoves and Heaters offers several models with different cooktop, oven and firebox configurations.
Pioneer Princess Wood Cook Stove
The Pioneer Princess from Suppertime Stoves has a smooth polished steel cooking surface, two removable lids and a large oven.
Its front-loading design provides easy access to the firebox, while the oven thermometer helps the cook monitor baking temperature. The stove also includes an internal flue damper and an optional water reservoir configuration.
The larger oven can accommodate holiday pies, bread, casseroles and roasting pans, subject to the dimensions and weight limits stated by the manufacturer.
Baker's Choice Wood Cook Stove
The Baker's Choice is a more compact Suppertime model with an airtight firebox, polished cooking surface and built-in oven.
Its smaller footprint can suit a cottage, hunt camp or home where space is limited. The oven is narrower than those found in some larger models, so cookware should be measured before planning a holiday menu.
Margin Gem Wood Cook Stove
The Margin Gem combines a cast iron cooking surface with a substantial baking oven.
It includes a bell draft control and Margin's air-jet re-burn design. Buyers can also choose between a shelf and a warming oven above the cooktop.
The large cooking surface provides room to move pots between hotter and cooler areas as meal preparation progresses.
Margin Flame View Cook Stove
The Margin Flame View includes a large double-plated steel cooking surface, a spacious oven and the largest firebox in the Margin series.
Its glass firebox door makes it easier to observe combustion without opening the stove. The model also includes a dual draft inlet, oven draft control and air-jet re-burn design.
These features can be helpful during a busy cooking day when both fire and food temperatures require attention.
Kitchen Queen 480 Wood Cook Stove
The Kitchen Queen 480 has a large cooking surface and an oven advertised with space for up to eight loaves.
Its airtight firebox and natural-convection design direct heat beneath the oven. The large cooktop offers room for multiple pots, making it well suited to preparing several parts of a holiday meal.
Kitchen Queen 550 Grand Comfort
The Kitchen Queen 550 Grand Comfort includes a glass oven door, glass fire-view door, thermostat control and an oven designed to hold up to eight loaves.
The viewing doors make it easier to monitor the fire and food without repeatedly opening the stove. Opening an oven door releases heat and can cause the temperature to fluctuate, so being able to observe the food through glass can be useful.
Specifications and available configurations can change. Confirm current dimensions, features and options with Northern Cookstoves before purchasing cookware or selecting a stove.
Start With Dry, Seasoned Firewood
Consistent cooking begins with consistent fuel.
Use properly seasoned firewood with a moisture content below 20 percent. Test the inside face of a freshly split piece with a moisture meter.
Wet firewood:
- Takes longer to ignite
- Produces less usable heat
- Makes oven temperatures difficult to control
- Creates more smoke
- Can darken viewing glass
- Contributes to creosote formation
Keep several split sizes available.
Small pieces ignite quickly and can help raise the oven temperature. Medium pieces provide a steadier cooking fire. Larger pieces may provide a longer burn but respond more slowly.
For more information, read Northern Cookstoves' guide to choosing wood for a Canadian wood cook stove.
How to Preheat a Wood Cook Stove Oven
Every stove has a different preheating procedure. Use the following as general principles and follow the model-specific manual.
1. Establish the Fire
Begin with dry kindling and gradually add seasoned firewood. Allow the chimney and stove body to warm.
Avoid filling the firebox immediately. A gradual startup provides more control and reduces smoke.
2. Set the Oven Control
Move the oven, bypass or heat-routing control into the baking position described in the manual.
Do not assume that open or closed means the same thing on every stove. On some models, the control redirects hot gases around or beneath the oven. On others, the heat path works differently.
3. Allow the Oven to Preheat
A wood cook stove oven may need more time to stabilize than a modern electric oven. Begin preheating well before the food is ready to bake.
The original article suggested a universal 45-minute preheating time. Actual time depends on:
- Stove model
- Starting temperature
- Chimney draft
- Firewood species and size
- Fuel moisture
- Desired oven temperature
- Outdoor conditions
Use the oven thermometer rather than the clock alone.
4. Make Small Adjustments
If the temperature is too low, add a modest amount of dry, appropriately sized firewood and adjust the combustion air according to the manual.
If the temperature is too high, follow the manufacturer's procedure for reducing heat. Do not close the combustion air so far that the fire smoulders.
The original article recommended opening the oven door to release heat. This may be appropriate for certain recipes or stoves, but it should not be treated as the primary method of controlling an overheating appliance. Correct the fire and airflow using the approved controls.
5. Allow Time for the Stove to Respond
A wood cook stove does not react instantly. Wait after each adjustment and watch the thermometer before making another change.
Repeated adjustments can cause the temperature to swing above and below the target.
Managing Uneven Oven Heat
Wood cook stove ovens can develop hotter areas. The location depends on how heat travels around the oven and where the firebox and exhaust passages are positioned.
Test your oven before an important holiday meal.
One simple method is to place slices of white bread across a baking sheet and observe which pieces brown first. This can help identify hotter and cooler locations.
When baking:
- Place pans where air and heat can circulate.
- Avoid pushing bakeware directly against oven walls.
- Rotate pans if food is browning unevenly.
- Switch rack positions only when necessary.
- Open the door briefly to reduce heat loss.
- Use bakeware that fits the oven correctly.
- Monitor delicate food more frequently.
Do not assume that every pan must be rotated at the exact halfway point. Check the food and respond to how it is baking.
Choosing Bakeware
Different materials transfer heat differently.
Cast Iron
Cast iron stores heat and works well for:
- Bread
- Cinnamon rolls
- Cobblers
- Braised dishes
- Roasts
- Deep-dish pies
It is heavy, so confirm that the oven rack can support the cookware and food.
Light-Coloured Metal Bakeware
Light-coloured aluminum or steel pans are often useful for:
- Cookies
- Pastries
- Biscuits
- Sheet cakes
- Dinner rolls
Dark metal pans may brown the bottoms and edges more quickly.
Glass and Ceramic Bakeware
Glass and ceramic dishes can work well for casseroles and pies, but they are vulnerable to thermal shock.
Do not place a cold glass dish into a very hot oven or set a hot dish on a cold or wet surface. Follow the cookware manufacturer's temperature and handling instructions.
Dutch Ovens
A lidded Dutch oven can help retain moisture in braises, stews and bread.
Use dry, heat-resistant gloves. Cast iron handles become extremely hot.
Understanding Cooktop Heat Zones
The cooking surface is generally hottest near or above the firebox. Heat usually decreases as cookware is moved farther away.
The exact pattern varies by stove.
High-Heat Area
The hottest section is useful for:
- Bringing water to a boil
- Searing meat
- Frying
- Reducing sauces
- Heating a pot quickly
Supervise food closely in this area.
Moderate-Heat Area
Move cookware to a moderate zone for:
- Maintaining a gentle boil
- Cooking vegetables
- Preparing gravy
- Cooking grains
- Simmering soup
Low-Heat Area
A cooler section may be suitable for:
- Holding an already-hot dish
- Keeping a kettle warm
- Melting butter carefully
- Maintaining a sauce
Check food temperature when holding perishable dishes. Health Canada advises keeping hot food at or above 60 C, or 140 F.
Warming Shelves and Warming Ovens
Equipped models may include an upper shelf or warming oven.
These areas can be useful for warming dishes or holding certain foods, but they may not remain hot enough to keep perishable food safe.
Use a food thermometer rather than assuming that a warming area is above 60 C.
Do not place towels, firewood, paper packaging or another combustible item on a warming shelf.
Safe Slow Cooking on a Wood Cook Stove
The original article stated that a meal could simmer all day without any worry of burning. Even on a cooler cooktop zone, food requires supervision.
When slow cooking:
- Bring food to the required cooking temperature promptly.
- Keep meat refrigerated until preparation begins.
- Avoid leaving raw ingredients in a lukewarm pot.
- Maintain a visible gentle simmer when the recipe calls for simmering.
- Stir periodically.
- Check that sufficient liquid remains.
- Use a lid when appropriate.
- Keep pot handles away from walkways.
- Check meat with a digital food thermometer.
- Do not leave the stove or cooking food unattended for long periods.
Bacteria grow quickly between 4 C and 60 C, or 40 F and 140 F. Keep hot food at or above 60 C once it has finished cooking.
Health Canada provides current safe internal cooking temperatures for meat, poultry, seafood, egg dishes and leftovers.
A Cozy Holiday Menu for the Wood Cook Stove
The following recipes can be prepared on a wood cook stove, but cooking time will vary with the stove, cookware, fire and oven temperature.
Use thermometers and visual checks rather than relying on time alone.
Hearthside Slow-Braised Beef Stew
This hearty stew can begin over the hotter section of the cooktop and finish at a gentle simmer.
Ingredients
- 2 pounds beef chuck, cut into cubes
- 2 tablespoons all-purpose flour
- 1 teaspoon salt
- 1/2 teaspoon black pepper
- 2 tablespoons cooking oil
- 1 large yellow onion, diced
- 3 garlic cloves, minced
- 4 carrots, chopped
- 3 celery stalks, chopped
- 2 tablespoons tomato paste
- 1 cup dry red wine or additional beef stock
- 3 cups beef stock
- 1 teaspoon dried thyme
- 1 teaspoon dried rosemary
- 2 cups potatoes, cut into chunks
- 1 bay leaf
Instructions
- Pat the beef dry. Toss it with flour, salt and pepper.
- Heat the oil in a heavy Dutch oven over the hotter section of the cooktop.
- Brown the beef in batches. Do not crowd the pot.
- Transfer the browned beef to a clean plate.
- Add the onion, carrots and celery. Cook until they begin to soften.
- Add the garlic and tomato paste. Cook for about one minute while stirring.
- Add the wine or extra stock. Scrape the browned pieces from the bottom of the pot.
- Return the beef to the pot.
- Add the remaining stock, thyme, rosemary and bay leaf.
- Bring the stew to a boil, then move it to a moderate cooktop zone.
- Cover and maintain a gentle simmer for approximately two to three hours.
- Add the potatoes during the final 45 to 60 minutes.
- Stir periodically and add more hot stock or water if necessary.
- Continue cooking until the beef is safely cooked and fork-tender.
- Remove the bay leaf before serving.
Cooking time may be longer depending on the meat and heat level. Do not leave the pot unattended for several hours.
Traditional French-Canadian Tourtiere
Tourtiere is a comforting holiday meat pie traditionally associated with French-Canadian celebrations.
Ingredients
- Pastry for one double-crust 9-inch pie
- 1 pound ground pork
- 1 pound ground beef
- 1 medium onion, finely chopped
- 2 garlic cloves, minced
- 1 teaspoon salt
- 1/2 teaspoon black pepper
- 1/2 teaspoon ground cinnamon
- 1/4 teaspoon ground cloves
- 1/4 teaspoon ground nutmeg
- 1 cup beef broth
- 1/2 cup plain mashed potatoes
- 1 egg beaten with 1 tablespoon water, optional
Prepare the Filling
- Place the ground pork and ground beef in a large skillet or Dutch oven.
- Add the onion and garlic.
- Cook over a moderate cooktop zone, breaking up the meat as it cooks.
- Add the salt, pepper, cinnamon, cloves and nutmeg.
- Continue cooking until the ground meat reaches at least 71 C, or 160 F.
- Stir in the beef broth and mashed potatoes.
- Simmer until the mixture is moist but no longer watery.
- Remove it from the heat and allow it to cool enough to handle safely.
- Do not leave the filling at room temperature for more than two hours.
Assemble and Bake
- Preheat the wood cook stove oven to approximately 400 F, or 204 C.
- Line a 9-inch pie plate with the bottom pastry.
- Add the meat filling and spread it evenly.
- Cover with the top pastry.
- Trim and crimp the edges.
- Cut several vents in the top.
- Brush with the egg wash if desired.
- Bake for approximately 35 to 45 minutes.
- Rotate the pie if one side browns more quickly.
- Confirm that the centre reaches at least 74 C, or 165 F.
- Allow the tourtiere to rest for 10 to 15 minutes before serving.
Serve it with cranberry sauce, chutney or traditional fruit ketchup.
Wood-Oven Cinnamon Rolls
These cinnamon rolls can be baked in a cast iron skillet or suitable baking dish.
Dough Ingredients
- 1 cup milk, warmed
- 2 1/4 teaspoons active dry yeast
- 1/4 cup granulated sugar
- 1 large egg
- 1/4 cup unsalted butter, melted and cooled slightly
- 3 1/4 cups all-purpose flour, plus more if needed
- 1 teaspoon salt
Filling Ingredients
- 1/3 cup softened butter
- 2/3 cup packed brown sugar
- 1 1/2 tablespoons ground cinnamon
Optional Icing
- 4 ounces cream cheese, softened
- 2 tablespoons butter, softened
- 1 cup icing sugar
- 1/2 teaspoon vanilla
- 1 to 2 tablespoons milk
Prepare the Dough
- Combine the warm milk, yeast and one teaspoon of the sugar.
- Let the mixture stand until foamy, approximately five to ten minutes.
- Stir in the remaining sugar, egg and melted butter.
- Add the flour and salt.
- Mix until a soft dough forms.
- Knead until smooth and elastic.
- Place the dough in a lightly greased bowl and cover it.
- Allow it to rise in a comfortably warm location until doubled.
Do not place the dough directly on a hot cooktop or warming shelf. Excessive heat can damage the yeast or create a fire risk if the covering contacts the stove.
Shape the Rolls
- Roll the dough into a rectangle.
- Spread the softened butter across the surface.
- Combine the brown sugar and cinnamon, then sprinkle the mixture over the butter.
- Roll the dough tightly into a log.
- Cut it into 12 pieces.
- Arrange the rolls in a greased 12-inch skillet or baking dish.
- Cover and allow them to rise until puffy.
Bake the Rolls
- Stabilize the wood cook stove oven near 350 F, or 177 C.
- Place the pan on the centre rack.
- Bake for approximately 22 to 30 minutes.
- Rotate the pan if the rolls are browning unevenly.
- Remove them when the tops are golden and the centre rolls are fully baked.
- Allow them to cool slightly before adding icing.
To prepare the icing, beat the cream cheese, butter, icing sugar and vanilla. Add enough milk to reach the desired consistency.
Preparing a Complete Holiday Meal
A wood cook stove can support several dishes at once when the cooktop is organized carefully.
A practical workflow may look like this:
- Begin by establishing a stable fire.
- Preheat the oven.
- Prepare foods that require longer cooking.
- Use the hotter cooktop area for browning and boiling.
- Move simmering dishes to moderate heat.
- Place baked dishes in the oven according to their required temperature.
- Use the cooler cooktop area for already-hot sauces and side dishes.
- Check hot-held food with a digital thermometer.
- Make small fuel adjustments as needed.
- Keep walkways and stove controls accessible.
Avoid placing so many pots on the stove that you cannot safely open the firebox, reach the controls or lift cookware.
Overnight Burns and Morning Cooking
Some wood cook stoves are designed to support extended burn times. For example, the Baker's Choice is marketed as capable of holding a fire overnight, while Kitchen Queen models publish approximate burn-time estimates for certain operating conditions.
Actual burn time depends on:
- Firewood species
- Moisture content
- Split size
- Fuel load
- Chimney draft
- Air settings
- Outdoor temperature
- Stove condition
- Installation
- Heating demand
The original article recommended loading large hardwood blocks and closing the primary air intake almost completely. That approach can create a smouldering fire, excessive smoke and creosote.
Only use an overnight burn procedure that is specifically approved for the stove.
Before going to bed:
- Confirm that loading and ash doors are fully closed.
- Make sure the stove is responding normally to its controls.
- Keep all combustibles outside required clearances.
- Confirm that smoke and carbon monoxide alarms are working.
- Follow the manufacturer's approved low-burn setting.
- Never modify a damper to extend burn time.
- Never operate a damaged stove overnight.
If the stove is not designed for an overnight fire, allow it to burn down safely and restart it in the morning.
When reloading in the morning, follow the model-specific procedure. Open any required bypass, allow the draft to respond and open the loading door slowly.
Adding Humidity Safely
Wood-heated homes can feel dry during winter, but adding too much moisture can contribute to condensation and mould.
Natural Resources Canada recommends maintaining indoor relative humidity between approximately 30 and 50 percent, with lower levels often needed during very cold weather.
Use an indoor hygrometer to monitor humidity rather than relying only on comfort.
If using a kettle or dedicated humidifying pot:
- Choose a stable, heat-safe container.
- Place it where it cannot be knocked over.
- Keep handles away from walkways.
- Do not fill it to the rim.
- Check the water level regularly.
- Do not allow it to boil dry.
- Keep children and pets away.
- Do not leave it unattended for long periods.
- Reduce moisture if condensation appears on windows or walls.
If you want to create a seasonal scent, use a separate supervised simmer pot. Cinnamon sticks, cloves and orange peel should not be placed in a kettle that will later be used for drinking water.
Turn off or remove the simmer pot when it is no longer being supervised.
Holiday Wood Cook Stove Safety
Before a busy cooking day:
- Test smoke and carbon monoxide alarms.
- Check that the chimney and stove are clean.
- Confirm that controls move properly.
- Use dry, seasoned firewood.
- Keep a suitable fire extinguisher accessible.
- Wear fitted clothing around the stove.
- Use dry oven mitts or heat-resistant gloves.
- Keep children and pets outside the work area.
- Turn pot handles away from edges.
- Keep towels, paper and packaging away from hot surfaces.
- Use a digital food thermometer.
- Do not leave cooking food unattended.
- Keep the firebox and ash doors securely closed.
- Maintain all required clearances.
If smoke enters the room, a carbon monoxide alarm sounds or the stove cannot be controlled, stop cooking and respond to the safety problem immediately.
Make Your Wood Cook Stove the Heart of the Holidays
A wood cook stove brings warmth, practicality and a strong sense of tradition to a Canadian winter kitchen.
Learning how to manage the fire, oven and cooktop takes practice. The reward is a cooking experience that can support simmering, searing, roasting, baking and home heating from one beautifully crafted appliance.
Whether you are baking cinnamon rolls in a Kitchen Queen, preparing tourtiere in a Pioneer Princess or simmering beef stew on a Margin Flame View, the most successful meals begin with dry firewood, thoughtful preparation and safe operation.
Explore Wood Cook Stoves in Canada
Northern Cookstoves and Heaters supplies handcrafted wood cook stoves for homes, farms, cottages, cabins and off-grid properties across Canada.
Explore the complete collections:
To compare cooking surfaces, oven capacities, heating estimates, reservoir options and other features, request a quote from Northern Cookstoves or call 519-788-3788.
| Tags:NewsCook StovesRecipesWood Cook Stoves |